Follow Me on Pinterest

Thursday, October 29, 2015

Halloween for Kids and Adults

Happy Thursday everyone! We are in the Halloween countdown here people! There's STILL time to make your desserts, and this year the kids can get involved (in some, not all) of the fun...

The family that bakes together...makes a mess together...
Peanut Butter Spider Cookies
Rosanna Pansino

Ingredients
  • 2 1/2 cups all-purpose flour
  • 1/2 teaspoon kosher salt
  • 1/4 teaspoon baking soda
  • 1 1/2 cups granulated sugar
  • 1 cup smooth peanut butter
  • 1 cup brown sugar
  • 1/2 cup (4 ounces) unsalted butter, at room temperature
  • 2 tablespoons vegetable oil
  • 1 egg
  • 3/4 teaspoon vanilla extract
  • 2 cups milk chocolate chips
  • 36 small chocolate-coated peanut butter cups, unwrapped
  • 72 candy eyes
Directions
Special equipment: one number 2 round pastry tip
  1. Preheat the oven to 350 degrees F.
  2. In a bowl, whisk together the flour, salt and baking soda.
  3. In the bowl of a stand mixer fitted with the paddle attachment, beat 1/2 cup of the granulated sugar, the peanut butter, brown sugar, butter and oil until light and fluffy. Add the egg and vanilla and beat until combined. Add the flour mixture and mix until the dough starts to come away from the bowl. Scoop portions of the dough onto a parchment-paper-lined baking sheet and refrigerate for at least 1 hour or up to overnight.
  4. Roll the cookies in the remaining 1 cup sugar to coat, then place them onto a parchment-paper-lined baking sheet approximately 1-inch apart. Bake for 8 to 10 minutes, then remove from the oven and carefully place your thumb in the center of each cookie. Return the baking sheet back to the oven and continue baking until the cookies are still soft to the touch and just a touch golden, 2 to 4 minutes. Be careful to avoid over-baking, as the cookies can become dry and tough. Cool the cookies completely.
  5. Melt the milk chocolate chips in the microwave and then place in a small pastry bag fitted with a very small round tip.
  6. Place the peanut butter cups upside-down into the indent of each cookie to create the spider bodies. Pipe a dot of chocolate onto the back of each candy eye and place in the center of the peanut buttercup right next to each other. Pipe 4 chocolate legs on each side of the body. Use the tip of a toothpick to smooth out the legs of the spiders.
  7. Allow the spider legs to set for 5 minutes, and then serve!
Notes: You can make these cookies ahead of time and store in an air-tight container for up to 3 days.


Pick your favorite cupcake recipe before you pipe on this cutie...
Purple Monster
Good Housekeeping

Ingredients
Bake your favorite cupcakes and turn your favorite frosting PURPLE!

Directions
Spoon purple frosting into a decorating bag fitted with a small star tip. Starting at the outer edge of the cupcake, pipe spikes of frosting in concentric circles to completely cover the top. Attach round white candies for eyes and mini M&M's for pupils, small red candy for the nose, and black shoestring licorice for hair.


For the mamas and the papas...and the annoying neighborhood kid that keeps bothering you (just kidding!)
Cinnamon Fireball Candies
Amanda Hesser

Ingredients
  • Vegetable spray
  • 1 ¾ cups sugar
  • ½ cup light corn syrup
  • 1 ½ teaspoons cinnamon extract or oil
  • 1 teaspoon red food coloring
Directions
  1. Line a baking sheet with parchment paper and coat with vegetable spray. Stir together the sugar and corn syrup and 1/2 cup water in a medium heavy saucepan. Cook over medium heat until it reaches 300 degrees on a candy thermometer.
  2. Remove from the heat, allow the bubbles to subside and then, with oven mitts on, stir in the cinnamon oil and food coloring. Pour the mixture onto the parchment paper and cool. Break into pieces.

Happy Halloween baking!

Wednesday, October 21, 2015

Pumpkin On My Mind

Wednesday's here and we're a few days away from my pumpkin picking weekend extravaganza! I'm looking forward to getting back to the farm, picking some pumpkins, and purchasing fresh apples (there's a big difference between what ends up in the store and what you buy at the farm!). How about fresh pumpkin ice cream? Yes, please! I've got so much pumpkin on the brain, I need to channel it into good use, i.e. baking. Love it or hate it, in the fall it always seems to come back to the pumpkin. With that, I give you pumpkin deliciousness!

Easy, peasy...
Pumpkin Parfaits
Justin Chapple

Ingredients
  • Two 15-ounce cans pumpkin puree
  • 1 teaspoon pumpkin pie spice
  • 1/4 teaspoon kosher salt
  • 4 cups mascarpone cheese
  • 2 1/2 cups confectioners’ sugar
  • 2 cups heavy cream
  • 1 1/2 cups crushed chocolate wafer cookies (6 ounces)
Directions
  1. In a large bowl, using a hand mixer, beat the pumpkin puree with the pumpkin pie spice, salt, 2 cups of the mascarpone and 1 1/2 cups of the confectioners’ sugar until thick.
  2. In another large bowl, beat the heavy cream with the remaining 2 cups of mascarpone and 1 cup of confectioners’ sugar until soft peaks form.
  3. Spoon half of the pumpkin mixture into 12 glasses and top with half of the mascarpone mixture and half of the crushed wafers. Repeat the layering once more. Refrigerate the parfaits until well-chilled, at least 1 hour, before serving.
MAKE AHEAD: The parfaits can be refrigerated for up to 2 days.


Great for lunch...
Pumpkin Cheesecake Crumble Squares
Jeanne Thiel Kelley

Ingredients
Crust:
  • 1 cup all purpose flour
  • 3/4 cup (packed) golden brown sugar
  • 1/2 teaspoon salt
  • 1/2 cup (1 stick) chilled unsalted butter, diced
  • 1 cup pecan halves (about 4 ounces)
  • 3/4 cup old-fashioned oats
Filling:
  • 1 (8-ounce) package cream cheese, room temperature
  • 3/4 cup canned pure pumpkin
  • 1/2 cup sugar
  • 1 large egg
  • 1 1/2 teaspoons ground cinnamon
  • 1 teaspoon ground ginger
Topping:
  • 1 cup sour cream
  • 2 tablespoons sugar
  • 1/4 teaspoon vanilla extract
Directions
For crust:
  1. Preheat oven to 350°F. Generously butter 9x9x2-inch metal baking pan. Line rimmed baking sheet with parchment. Using on/off turns, blend first 4 ingredients in processor until coarse meal forms. Add pecans; using on/off turns, process until nuts are chopped. Add oats; process using on/off turns until mixture is moistened but not clumping. Press 3 1/2 cups crumbs onto bottom of prepared square pan (do not clean processor). Transfer remaining crumbs to lined baking sheet. Bake crumbs on sheet until golden, stirring once, about 12 minutes. Cool crumbs. Bake crust until golden, about 30 minutes. Remove from oven while preparing filling. Maintain oven temperature.
For filling:
  1. Blend all ingredients in same processor until smooth. Spread filling over warm crust; bake until set, dry in center, and beginning to rise at edges, about 20 minutes. Maintain oven temperature.
For topping:
  1. Mix all ingredients in small bowl. Spread evenly over hot filling. Bake until topping sets and bubbles at edges, about 5 minutes. Cool completely in pan on rack. Sprinkle crumbs over topping; gently press into topping. Cover; chill until cold, about 2 hours. 
Do ahead: Can be made 2 days ahead. Keep chilled. Cut into squares.


Fancy Shmancy...
Maple Pumpkin Brulee Pie
Saveur

Ingredients

  • Flour, for dusting
  • 1⁄2 recipe Flaky Butter Pie Dough
  • 1⁄4 cup dark brown sugar
  • 1⁄4 cup granulated sugar
  • 2 eggs
  • 1 (15-oz.) can pumpkin purée
  • 1 cup heavy cream
  • 1⁄4 cup maple syrup
  • 2 1⁄2 tbsp. potato starch
  • 2 1⁄2 tsp. ground cinnamon
  • 1 1⁄2 tsp. ground ginger
  • 1 tsp. freshly grated nutmeg
  • 1⁄2 tsp. ground clove
  • 1⁄2 tsp. Kosher salt
  • 1⁄4 cup Demerara sugar

Directions

  1. Heat oven to 375°. On a lightly floured surface, roll dough into a 12″ round. Fit into a 9″ pie plate. Trim edges and crimp; chill 30 minutes.
  2. Whisk sugars and eggs in a bowl until pale and fluffy. Add pumpkin, cream, syrup, potato starch, cinnamon, ginger, nutmeg, clove, and salt; whisk until smooth. Pour filling over dough; using a spatula, spread into an even layer. Bake until just set in the center, 45–50 minutes. Transfer pie to a rack; let cool to room temperature, then refrigerate until cold, about 1 hour.
  3. Sprinkle Demerara sugar evenly over surface of pie. Guide the flame of a blowtorch back and forth over surface until sugar caramelizes. Serve immediately.

Happy baking!

Monday, October 19, 2015

Howling for Halloween

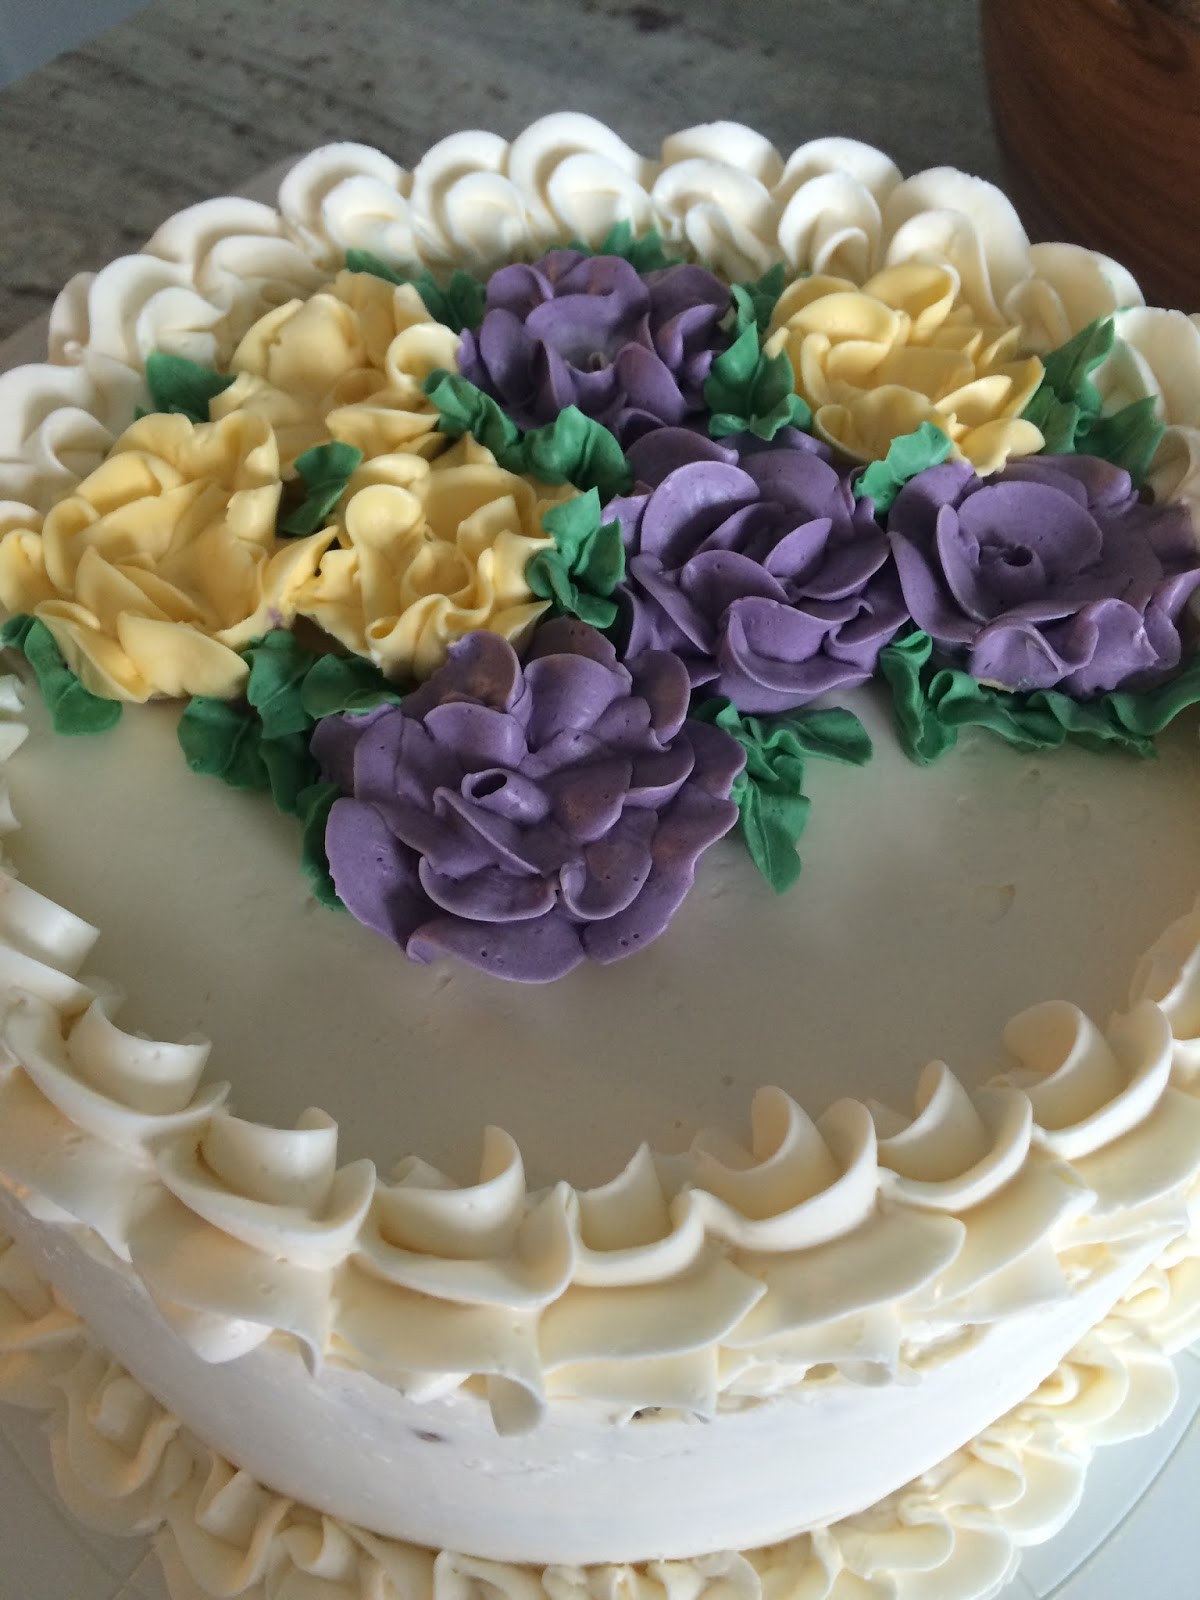
Happy Monday everyone! I am back to the blog while my baby sleeps nearby...and while I know I should be napping (no need to remind me), since the little guy is about to wake up I figure I've got a few minutes to share some recipes! Halloween is only a few weeks away so it's time to start brewing up some treats (see what I did there?). While it's not the holiday for "pretty" cakes, like this one for my husband's birthday:
Almond cake with cannoli cream filling, topped with
classic vanilla buttercream.
www.lizzybeesbakery.com (local deliveries only!)
...we can still enjoy looking at one, can't we? Ready for dessert yet? Let's do it, Halloween-style!

Devil's Food Cupcakes with Espresso Meringue
Karen Hatfield for Food & Wine

Ingredients
  • Vegetable oil spray
  • 4 ounces unsweetened chocolate, finely chopped
  • 1/4 cup Dutch-process cocoa powder, plus more for sprinkling
  • 1 1/4 cups boiling water
  • 1 1/2 cups all-purpose flour
  • 1 teaspoon baking soda
  • 1/4 teaspoon salt
  • 2 sticks unsalted butter (1/2 pound), softened
  • 1 1/2 cups packed dark brown sugar
  • 3 large eggs
  • 1/2 cup buttermilk
  • 1 teaspoon pure vanilla extract
  • 3 large egg whites
  • 1 1/2 cups confectioners' sugar
  • 1 teaspoon instant espresso, plus more for sprinkling
Directions
  1. Preheat the oven to 325°. Line 24 muffin cups with paper liners. Lightly spray the paper liners with vegetable oil spray. In a small bowl, mix the chocolate and 1/4 cup of cocoa. Add the boiling water and let melt, then whisk until smooth. In a medium bowl, whisk the flour with the baking soda and salt. In a large bowl, using an electric mixer, beat the butter and brown sugar until fluffy. Beat in the eggs, buttermilk and vanilla, then slowly beat in the dry ingredients and the chocolate mixture in 3 alternating batches.
  2. Fill the muffin cups three-fourths full with the batter. Bake for 22 to 25 minutes, shifting the pans halfway through, until the cupcakes are springy and a toothpick inserted in the center comes out with a few moist crumbs attached. Let the cupcakes cool in the pans for 15 minutes, then unmold them and transfer to a rack to cool completely.
  3. Mix the egg whites, confectioners' sugar and 1 teaspoon of espresso in a medium stainless steel bowl. Set the bowl over a saucepan of simmering water and heat the whites, whisking constantly, until hot to the touch (165°). Transfer the mixture to the bowl of a standing electric mixer fitted with a whisk and beat at high speed until the meringue is stiff and glossy, about 5 minutes; if using a handheld mixer, beat for about 8 minutes.
  4. Scoop half of the espresso meringue into a pastry bag fitted with a large (3/4-inch) plain tip and pipe the meringue onto half of the cupcakes. Repeat with the remaining espresso meringue and cupcakes. Lightly sprinkle the meringue with cocoa and espresso powder and serve.
MAKE AHEAD: The frosted devil's food cupcakes can be kept in an airtight container overnight.


"Candy Corn" Pumpkin Blondies
Genevieve Ko

Ingredients
For the blondies:
  • 1 cup (2 sticks) cold unsalted butter, plus more for the pan
  • One 15-ounce can pure pumpkin
  • 1/2 cup pure maple syrup
  • 2 teaspoons pumpkin-pie spice
  • 2 cups all-purpose flour
  • 1 teaspoon baking powder
  • 1/2 teaspoon salt
  • 1 1/2 cups packed light-brown sugar
  • 2 large eggs
  • 2 teaspoons pure vanilla extract
For the icing:
  • One (8-ounce) package cream cheese, softened
  • 1/4 cup confectioners' sugar
  • 1/4 cup pure maple syrup
  • 2 tablespoons fresh lemon juice
  • 1/8 teaspoon salt
  • Orange and yellow food coloring (preferably gel paste) for decorating
Directions
Make the blondies:
  1. Preheat oven to 350°F. Lightly butter a 9- by 13-inch baking pan, line with parchment paper, and butter again.
  2. In a medium saucepan, cook the pumpkin over medium heat, stirring frequently, until reduced to 1 cup, about 10 minutes. Add the maple syrup and cook, stirring, for 3 minutes. Remove from the heat and stir in the pumpkin pie spice and butter until the butter melts. Transfer mixture to a large bowl. Let stand until room temperature, about 10 minutes.
  3. Meanwhile, in a medium bowl, whisk the flour, baking powder, and salt. Stir the brown sugar into the pumpkin mixture, then stir in the eggs and vanilla until incorporated. Add the flour mixture and stir until smooth. Spread evenly in the prepared pan.
  4. Bake until a tester inserted in the center comes out clean, about 30 minutes. Cool completely in the pan on a wire rack.
  5. Place a large cutting board on top of the pan of blondies. Invert the pan and cutting board together, then lift off the pan and peel off the parchment paper. Cut the blondies into 3 even strips lengthwise, then cut each strip into 10 triangles with approximately 2-inch bases (you will have 1 smaller triangle on each end). Transfer the triangles to a large serving platter, flat bottom sides up.
Make the icing:
  1. In a large bowl, beat the cream cheese with an electric mixer on medium-high speed until smooth and fluffy. Add the confectioners' sugar, maple syrup, lemon juice, and salt. Beat on low speed until well-mixed, then raise the speed to medium-high and beat until smooth, scraping down the sides of the bowl occasionally.
Decorate the blondies:
  1. Transfer half of the icing to another large bowl and tint with orange. Transfer two thirds of the remaining to another bowl and tint yellow. Divide the orange, yellow, and white icings among 3 piping bags or resealable plastic bags. Snip small holes in the corner of each. Pipe the icings on the blondies in stripes to resemble candy corn: a thin strip of yellow along the wide end, a thick strip of orange in the center, and a small white tip. Let stand until set.
Do ahead:
  1. The blondies can be tightly wrapped and stored at room temperature for up to 3 days. The iced blondies can be kept at room temperature for up to 4 hours.


Coconut-and-Almond Candy
Anita Chu

Ingredients
  • 7 fluid ounces sweetened condensed milk
  • 1 teaspoon vanilla extract
  • 1/8 teaspoon salt
  • 2 1/4 cups confectioners' sugar
  • 14 ounces sweetened flaked coconut
  • 1/2 cup whole almonds, toasted
  • 16 ounces milk chocolate or coating chocolate
Directions
  1. Line a 9-by-13-inch pan with foil and coat it with nonstick cooking spray.
  2. Combine condensed milk, vanilla extract, and salt in a bowl.
  3. Add confectioners' sugar 1 cup at a time and stir with a wooden spoon until fully incorporated.
  4. Add coconut and stir until combined.
  5. Pour the mixture into the baking pan and press it into an even layer. Then press the almonds into the mixture in even rows. Chill candy in refrigerator until firm, about 1 hour.
  6. Using a sharp chef's knife, cut the candy into small rectangles.
  7. Line a baking sheet with parchment or wax paper.
  8. Melt and temper the chocolate, or simply melt the coating chocolate.
  9. Dip the bars into the chocolate, covering completely, and place them on the prepared sheet.
  10. Refrigerate candy for 30 minutes or until the chocolate has set.
Storage: Store in an airtight container in a cool, dry place for up to 1 week.

Happy spooky baking!

Tuesday, October 6, 2015

Latest Updates!

Happy Tuesday everyone! Here's the update: my husband and I welcomed a baby boy into the world on Sunday. I'll be back soon with more tips, tricks, and recipes soon, but in the meantime here is a photo of a recent day in the kitchen for an upcoming celebration:

GIANT cinnamon babka!
Babka: A yeasty, brioche-like cake. 

Thursday, October 1, 2015

Take Me to the Tailgate!

Lizzy Bee brownies cooling on the rack.
Happy Thursday everyone! The weather is cooling off and that can only mean one thing - football season is upon us! It's time to place your fall orders at Lizzy Bee's Bakery for brownies, cookies, and cakes! However for right now, in honor of America's favorite pastime (and the tailgating that goes with it) here are a few desserts you can grab and eat in the back of your truck.

Coconut Blondies
Gourmet, March 1992

Ingredients
  • 1 1/2 sticks (3/4 cup) unsalted butter, softened
  • 1 1/2 cups firmly packed light brown sugar
  • 2 large eggs
  • 2 teaspoons vanilla
  • 1/2 teaspoon salt
  • 1 1/2 teaspoons double-acting baking powder
  • 1 1/2 cups all-purpose flour
  • 1 1/2 cups semisweet chocolate chips
  • 2 cups sweetened flaked coconut, toasted and cooled
Directions
  1. In a bowl with an electric mixer cream together the butter and the brown sugar, beating the mixture until it is light and fluffy, add the eggs, 1 at a time, beating well after each addition, and beat in the vanilla. I
  2. n a small bowl whisk together the salt, the baking powder, and the flour, add the flour mixture to the butter mixture, and beat the batter until it is just combined. 
  3. Stir in the chocolate chips and the coconut, spread the batter evenly in a buttered and floured 13- by 9-inch baking pan, and bake it in the middle of a preheated 350°F oven for 25 to 30 minutes, or until it begins to pull away from the sides of the pan and crumbs adhere to a tester. Let the mixture cool completely in the pan on a rack and cut it into squares.


Peanut Butter Crispy Bars
Baked, 2011

Ingredients
Crispy Crunch Layer:
  • 1 3/4 cups crisped rice cereal
  • Nonstick cooking spray
  • 1/4 cup sugar
  • 3 tablespoons light corn syrup
  • 3 tablespoons unsalted butter, melted
Milk Chocolate Peanut Butter Layer:
  • 5 ounces good-quality milk chocolate, coarsely chopped
  • 1 cup creamy peanut butter
Chocolate Icing:
  • 3 ounces dark chocolate (60 to 72 percent cacao), coarsely chopped
  • 1/2 teaspoon light corn syrup
  • 4 tablespoons (1/2 stick) unsalted butter
Directions
For the crispy crust layer: 
  1. Put the cereal in a large bowl and set aside. Lightly spray a paper towel with nonstick cooking spray and use it to rub the bottom and sides of an 8-inch-square baking pan. 
  2. Into a small saucepan, pour 1/4 cup water. Gently add the sugarand corn syrup (do not let any sugar or syrup get on the sides of the pan) and use a small wooden spoon to stir the mixture until just combined. Put a candy thermometer in the saucepan. Cook over medium-high heat and bring to a boil. Cook until the mixture reaches the soft-ball stage, 235 degrees F. Remove from the heat, stir in the butter and pour the mixture over the cereal. Working quickly, stir until the cereal is thoroughly coated, and then pour it into the prepared pan. Using your hands, press the mixture into the bottom of the pan (do not press up the sides). Let the crust cool to room temperature while you make the next layer. 
For the milk chocolate peanut butter layer: 
  1. In a large nonreactive metal bowl, stir together the chocolate and the peanut butter. Set the bowl over a saucepan of simmering water and cook, stirring with a rubber spatula, until the mixture is smooth. Remove the bowl from the pan and stir for about 30 seconds to cool slightly. Pour the mixture over the cooled crispy crust layer. Put the pan in the refrigerator until the top layer hardens, about an hour. 
For the chocolate icing: 
  1. In a large nonreactive metal bowl, combine the chocolate, corn syrup and butter. Set the bowl over a saucepan of simmering water and cook, stirring with a rubber spatula, until the mixture is completely smooth. Remove the bowl from the pan and stir for 30 seconds to cool slightly. Pour the mixture over the chilled milk chocolate peanut butter layer and spread into an even layer. Put the pan in the refrigerator until the topping hardens, about an hour. 
  2. Cut into 9 squares and serve. The bars can be stored in the refrigerator, covered tightly, for up to 4 days.

Jam Thumbprints
Saveur (who adapted from Better Homes & Gardens Cookbook)

Ingredients

  • 6 tbsp. unsalted butter, plus more for greasing
  • 1⁄2 cup sugar
  • 2 eggs, separated
  • 1 tsp. vanilla extract
  • 1 1⁄2 cups flour
  • 1 cup finely chopped walnuts
  • 1⁄3 cup jam or preserves, any flavor

Directions

  1. Using an electric hand mixer, beat butter and sugar until fluffy. With the motor running, add egg yolks and vanilla until combined; slowly add in flour until a dough forms. Cover and chill for 1 hour.
  2. Heat oven to 375°. Grease 2 baking sheets; set aside. Lightly beat egg whites; set aside. Shape dough into 1” balls. Roll balls in egg whites, then in nuts. Place 1” apart on prepared cookie sheets; using your index finger or the end of a wooden spoon, press into balls to create a deep well. Bake for 10 minutes until bottoms are light brown. Transfer to wire rack to cool. Fill center of each cookie with jam before serving.
Happy baking!

Monday, September 28, 2015

Pumpkin Cupcakes!

Happy Monday everyone! I was going to make a really stupid joke a la the "Hump Day" camel commercial (Pump Day! Get it? Pumpkin? Pump? See, this is why I left it alone...) but I will spare looooooove me some pumpkin desserts! So in honor of that love affair, here are a few pumpkin cupcake ideas (and bonus! One is gluten free!)
you. Instead let's just get right into it. I made mini pumpkin cupcakes with maple mascarpone frosting this weekend to say thank you to some very generous people who gave me and my husband baby gifts for our impending little dinosaur. I held out as long as I could before I jumped on the pumpkin wagon..but I just

Seasonally appropriate...
Mini Halloween Pumpkin Cupcakes
Bon Appetit, October 2009

Ingredients
  • 1 cup self-rising flour
  • 2/3 cup (packed) golden brown sugar
  • 2 teaspoons pumpkin pie spice
  • 1 large egg
  • 1/2 cup canned pure pumpkin
  • 1/3 cup vegetable oil
  • 1/3 cup sour cream
  • 1 1/2 teaspoons vanilla extract
  • Chopped crystallized ginger (optional)
  • 1 8-ounce package cream cheese, room temperature
  • 1/2 cup (1 stick) unsalted butter, room temperature
  • 2 cups powdered sugar
  • Orange and black food coloring; orange, black, white, and yellow candies and sugar crystals
  • Special Equipment: Mini muffin pans 13/4x1-inch paper liners
Directions
  1. Preheat oven to 350°F. Line 24 mini muffin cups with 1 3/4x 1-inch paper liners. Mix flour, golden brown sugar, and pumpkin pie spice in large bowl. Whisk egg, canned pure pumpkin, vegetable oil, sour cream, and vanilla extract in medium bowl. Add mixture to dry ingredients; stir to fully combine. Spoon batter into paper liners (batter will almost fill liners). Scatter crystallized ginger over, if desired. Bake cupcakes until tester inserted into center comes out clean, about 16 minutes. Remove cupcakes from pan and let cool completely on rack. Using electric mixer, beat cream cheese and butter in large bowl to blend. Beat in powdered sugar.
  2. Divide frosting among 3 bowls. Tint frosting in first bowl with orange coloring (or combine red and yellow coloring to make orange) and frosting in second bowl with black coloring, keeping frosting in third bowl white. Chill frosting 2 hours or until firm enough to easily spread. Frost cupcakes; decorate using candy and sugar crystals as desired.

Gluten free for you and me!
Gluten-Free Pumpkin-Ginger Cupcakes
Mani Niall

Ingredients
  • 6 ounces mascarpone, at room temperature
  • 6 ounces cream cheese, at room temperature
  • 3 3/4 cups confectioners' sugar, sifted
  • 1 tablespoon pure vanilla extract
  • 1 cup white rice flour
  • 1/2 cup tapioca flour
  • 1 teaspoon baking powder
  • 1/2 teaspoon baking soda
  • 1 teaspoon kosher salt
  • 1 teaspoon ground ginger
  • 3/4 teaspoon ground cinnamon
  • 1/4 teaspoon ground allspice
  • 1/4 teaspoon freshly grated nutmeg
  • 3/4 cup packed light brown sugar
  • 3/4 cup granulated sugar
  • 3/4 cup vegetable oil
  • 3 large eggs, at room temperature
  • 1 1/4 cups pure pumpkin puree
  • 1/2 cup sugar
  • 3/4 cup heavy cream
  • 1/2 teaspoon flaky sea salt, such as Maldon
  • 1/4 cup chopped or sliced crystallized ginger, for garnish (optional)
Directions
  1. MAKE THE FROSTING: In a medium bowl, using an electric mixer, beat the mascarpone and cream cheese until smooth. Add the confectioners' sugar and beat until incorporated. Beat in the vanilla. Cover and refrigerate the frosting until it is firm enough to spread, about 1 hour.
  2. MEANWHILE, MAKE THE CUPCAKES: Preheat the oven to 350°. Line 16 muffin cups with paper liners. In a large bowl, whisk the rice flour with the tapioca flour, baking powder, baking soda, salt, ginger, cinnamon, allspice and nutmeg. In a medium bowl, whisk the brown sugar with the granulated sugar, vegetable oil and eggs. Add the wet ingredients to the dry ingredients and whisk until smooth; whisk in the pumpkin puree.
  3. Spoon the batter into the prepared muffin cups. Bake for about 25 minutes, until the cupcakes spring back when gently pressed. Transfer the cupcakes to a rack and let cool completely.
  4. MAKE THE CARAMEL: In a medium saucepan, spread the sugar evenly and cook over moderately low heat, shaking the pan to keep the sugar in an even layer. Cook, swirling the saucepan occasionally, until the sugar is melted and a deep-amber caramel forms. Slowly add the cream (be careful, the caramel will boil vigorously) and cook, whisking, until smooth. Transfer the caramel to a heatproof bowl and stir in the salt. Let cool to room temperature.
  5. Frost the cupcakes and drizzle with the caramel sauce. Garnish with the crystallized ginger and serve.
MAKE AHEAD: The unfrosted cupcakes can be stored overnight in an airtight container at room temperature. The caramel can be refrigerated for up to 1 week; rewarm before using.


Yes, it's a cake...but bake them in cupcake molds! Start 10 min, turn and flip pans, then another 8-10 min and check.
Spiced Pumpkin Cake with Caramel Icing
Bon Appetit, December 2002

Ingredients
Cake:
  • 3 cups sifted cake flour (sifted, then measured)
  • 2 teaspoons baking powder
  • 1 1/2 teaspoons ground cinnamon
  • 1 teaspoon baking soda
  • 1 teaspoon ground ginger
  • 1/2 teaspoon salt
  • 1/4 teaspoon ground allspice
  • 1/8 teaspoon ground cloves
  • 2 cups sugar
  • 1 cup canola oil or vegetable oil
  • 4 large eggs
  • 1 15-ounce can pure pumpkin
  • 1 teaspoon vanilla extract
Caramel icing and fruit and walnut filling:
  • 1/2 cup dark rum
  • 6 tablespoons raisins
  • 6 tablespoons dried sweetened cranberries
  • 3/4 cup heavy whipping cream
  • 6 ounces cream cheese, cut into small pieces, room temperature
  • 2 1/4 cups sugar
  • 2/3 cup water
  • 1/2 cup (1 stick) plus 1 tablespoon unsalted butter, cut into 1/2-inch cubes
  • 1 1/2 cups walnuts, toasted, chopped
  • 1 teaspoon grated orange peel
  • Thin orange peel strips
  • Vanilla ice cream
Directions
For cake:
  1. Position rack in center of oven and preheat to 350°F. Butter and flour two 9-inch-diameter cake pans with 1 1/2-inch-high sides. Sift first 8 ingredients into medium bowl. Using electric mixer, beat sugar and oil in large bowl until well blended, about 2 minutes. Add eggs 1 at a time, beating well after each addition. Add pumpkin and vanilla; beat until blended. Gradually add dry ingredients; beat just until incorporated. Divide batter between prepared pans; smooth top with spatula.
  2. Bake cakes until tester inserted into center comes out clean, about 30 minutes. Cool completely in pans on racks. Run small knife around cakes to loosen. Turn cakes out onto racks.
For icing and filling:
  1. Stir rum, raisins, and dried cranberries in small saucepan over low heat just until warm, about 1 minute. Remove from heat; let stand 30 minutes. Drain, reserving rum and fruit separately.
  2. Whisk whipping cream and cream cheese in small bowl until smooth. Combine sugar and 2/3 cup water in heavy medium saucepan. Stir over medium-low heat until sugar dissolves. Increase heat to high; boil without stirring until syrup is deep amber color, occasionally brushing down sides of pan with pastry brush dipped in water and swirling pan, about 10 minutes. Slowly and carefully whisk in cream cheese mixture (caramel mixture will bubble vigorously). Add butter; whisk until mixture is smooth, about 1 minute. Remove from heat; cool caramel icing 10 minutes, whisking occasionally.
  3. Pour 3/4 cup warm caramel icing mixture into bowl. Mix in half of reserved dried fruit mixture, 1 cup walnuts, and grated orange peel. Place 1 cake layer on 8-inch-diameter tart pan bottom or cardboard round. Brush top of cake with half of reserved rum. Spread caramel-nut filling over, leaving 1/2-inch plain border at edges. Top with second cake layer, flat side down; press to adhere. Brush top of cake with remaining rum; let stand 10 minutes to allow rum to soak in.
  4. Pour generous 1/2 cup warm caramel icing onto cake and, if necessary, spread over top with offset spatula to cover. Refrigerate cake and remaining caramel icing until icing is firm enough to spread and to adhere to sides of cake, stirring occasionally, about 1 hour.
  5. Transfer 3/4 cup chilled icing to small bowl and chill for sauce. Using offset spatula, spread remaining 1 cup icing evenly over sides of cake to cover. Mix remaining dried fruit mixture and remaining 1/2 cup walnuts in another small bowl. Sprinkle mixture in 1 1/2-inch-wide border around top edge of cake. Cover cake with cake dome and chill at least 6 hours. (Can be made 2 days ahead. Keep cake and caramel icing for sauce chilled separately.)
  6. Place cake on platter. Garnish with orange peel. Rewarm icing over low heat just until pourable. Serve cake cold with ice cream and warm caramel sauce.

Happy baking!

Tuesday, September 22, 2015

Pretend The Fruit Makes it Healthy!

Happy Tuesday everyone! Are you sick of the fall posts yet? Today we're using fall fruits to create delightfully moist cakes - so who can complain about that? This post's inspiration comes from a delicious apple crumb cake I made last week (I was craving cake - we can blame the pregnancy, but let's be honest; I always crave cake). The great thing about fruit-filled cakes is that you don't need to buy more than 1-2 pieces of fruit (though if you're like me, and just went apple picking, 2 of 25 apples doesn't really make a dent...). At any rate, I've compiled a few recipes that'll help you get a little serving of those healthy fruits from the (former) food pyramid, while wrapped in an unhealthy, sugary coat.

Pear Crumb Cake
Melissa Clark

Ingredients
Pears:
  • 1 tablespoon/14 grams unsalted butter
  • 1 tablespoon/15 milliliters honey
  • 2 small or 1 1/2 large pears, cored and sliced 1/4-inch thick
  • 1 teaspoon/5 milliliters fresh lemon juice
  • ½ teaspoon freshly grated nutmeg
  • ½ teaspoon grated lemon zest
  • Pinch of salt
Crumb Topping:
  • 1 ⅓ cups/165 grams all-purpose flour
  • ⅓ cup/65 grams dark brown sugar, lightly packed
  • ⅓ cup/65 grams light brown sugar, lightly packed
  • 1 teaspoon/8 grams groundcinnamon
  • ¼ teaspoon/2 grams groundallspice
  • ¼ teaspoon/1 gram fine sea salt
  • 1 stick/113 grams unsalted butter, melted
Cake:
  • ½ cup plus 1 tablespoon/133 milliliters sour cream
  • 3 large eggs
  • 1 tablespoon/15 milliliters vanilla extract
  • 1 ½ cups/185 grams all-purpose flour
  • ¾ cup/150 grams granulated sugar
  • ¾ teaspoon/3 grams baking soda
  • ¾ teaspoon/2 grams baking powder
  • ½ teaspoon/3 grams fine sea salt
  • 1 stick/113 grams softenedunsalted butter, cut into pieces
Directions
  1. Heat oven to 350 degrees. Butter a 9-inch cake pan; line with parchment paper and butter the paper.
  2. In a skillet, melt butter and honey. Add pears, lemons juice, nutmeg, zest and salt and sauté until the pears are just tender, 5 to 7 minutes. Cool.
  3. For the topping, whisk together flour, sugars, spices and salt in a bowl. Pour in the melted butter and stir until crumbs form.
  4. Whisk together sour cream, eggs and vanilla. In the bowl of a standing mixer fitted with the paddle attachment, mix flour, sugar, baking soda, baking powder and salt. Add softened butter and beat for 10 seconds to combine. Beat in egg mixture, continuing to beat until very smooth.
  5. Pour batter into pan and top with the pear slices, spreading them out evenly (if there is liquid in the pan with the pears, don’t add it). Use your fingers to squeeze together large crumbs from the topping and scatter evenly on top of pears.
  6. Bake for 50 to 65 minutes, until the cake is set and the center springs back when very gently pressed with a finger. A cake tester may come out with crumbs attached, but it shouldn’t be wet. Transfer cake to a wire rack and cool completely, at least 2 hours before serving. Cake can be made a day ahead.

Old-Fashioned Banana Cake
Ina Garten

Ingredients
  • 3 very ripe bananas, mashed
  • 3/4 cup granulated sugar
  • 1/2 cup light brown sugar, lightly packed
  • 1/2 cup vegetable oil
  • 2 extra-large eggs, at room temperature
  • 1/2 cup sour cream
  • 1 teaspoon pure vanilla extract
  • Grated zest of 1 orange
  • 2 cups all-purpose flour
  • 1 teaspoon baking soda
  • 1/2 teaspoon kosher salt
  • 1/2 cup coarsely chopped walnuts (optional)
  • Walnut halves, for decorating (optional)
Cream Cheese Frosting:
  • 6 ounces cream cheese, at room temperature
  • 6 tablespoons (3/4 stick) unsalted butter, at room temperature
  • 1 teaspoon pure vanilla extract
  • 2 1/2 cups sifted confectioners' sugar (1/2 pound)
Directions
  1. Preheat the oven to 350 degrees. Grease and flour a 9 by 2-inch round cake pan.
  2. In the bowl of an electric mixer fitted with the paddle attachment, mix the bananas, granulated sugar, and brown sugar on low speed until combined. With the mixer still on low, add the oil, eggs, sour cream, vanilla, and orange zest. Mix until smooth.
  3. In a separate bowl, sift together the flour, baking soda, and salt. With the mixer on low, add the dry ingredients and mix just until combined. Stir in the chopped walnuts, if using. Pour the batter into the prepared pan and bake for 45 to 50 minutes, until a toothpick inserted in the center comes out clean. Cool in the pan for 15 minutes, turn out onto a cooling rack, and cool completely.
  4. Spread the frosting thickly on the top of the cake and decorate with walnut halves, if using.
Cream Cheese Frosting:
  1. Mix the cream cheese, butter, and vanilla in the bowl of an electric mixer fitted with the paddle attachment on low speed until just combined. Don't whip! Add the sugar and mix until smooth. Yield: frosting for one 9-inch cake.

Marie-Helene's Apple Cake
Dorie Greenspan

Ingredients
  • 3/4 cup all-purpose flour
  • 3/4 teaspoon baking powder
  • Pinch of salt
  • 4 large apples (if you can, choose 4 different kinds)
  • 2 large eggs
  • 3/4 cup sugar
  • 3 tablespoons dark rum
  • 1/2 teaspoon pure vanilla extract
  • 8 tablespoons (1 stick) unsalted butter, melted and cooled
Directions
  1. Center a rack in the oven and preheat the oven to 350 degrees F. Generously butter an 8-inch springform pan and put it on a baking sheet lined with a silicone baking mat or parchment paper and put the springform on it.
  2. Whisk the flour, baking powder, and salt together in small bowl.
  3. Peel the apples, cut them in half and remove the cores. Cut the apples into 1- to 2-inch chunks.
  4. In a medium bowl, beat the eggs with a whisk until they're foamy. Pour in the sugar and whisk for a minute or so to blend. Whisk in the rum and vanilla. Whisk in half the flour and when it is incorporated, add half the melted butter, followed by the rest of the flour and the remaining butter, mixing gently after each addition so that you have a smooth, rather thick batter. Switch to a rubber spatula and fold in the apples, turning the fruit so that it's coated with batter. Scrape the mix into the pan and poke it around a little with the spatula so that it's evenish.
  5. Slide the pan into the oven and bake for 50 to 60 minutes, or until the top of the cake is golden brown and a knife inserted deep into the center comes out clean; the cake may pull away from the sides of the pan. Transfer to a cooling rack and let rest for 5 minutes.
  6. Carefully run a blunt knife around the edges of the cake and remove the sides of the springform pan. (Open the springform slowly, and before it's fully opened, make sure there aren't any apples stuck to it.) Allow the cake to cool until it is just slightly warm or at room temperature. If you want to remove the cake from the bottom of the springform pan, wait until the cake is almost cooled, then run a long spatula between the cake and the pan, cover the top of the cake with a piece of parchment or wax paper, and invert it onto a rack. Carefully remove the bottom of the pan and turn the cake over onto a serving dish.
Serving:
  1. The cake can be served warm or at room temperature, with or without a little softly whipped, barely sweetened heavy cream or a spoonful of ice cream. Marie-Hélène's served her cake with cinnamon ice cream and it was a terrific combination.
Storing:
  1. The cake will keep for about 2 days at room temperature and, according to my husband, gets more comforting with each passing day. However long you keep the cake, it's best not to cover it - it's too moist. Leave the cake on its plate and just press a piece of plastic wrap or wax paper against the cut surfaces.

Happy baking!